Very Dirty Mop? Don’t Throw It Away — Clean It Like New With One Simple Ingredient
A dirty mop can quickly start spreading more germs than it removes. Over time, it collects grease, bacteria, and bad odors—making cleaning less effective. But instead of replacing it, you can often restore it with a simple deep-cleaning method using a common household ingredient.
Why Mops Get So Dirty
Mops trap:
- Dirt and dust
- Grease from floors
- Bacteria and mold spores
- Moisture that causes bad odor
If not cleaned properly, they become less effective and can even smell unpleasant.
The Simple Ingredient That Helps
One of the most effective and affordable cleaning agents is Baking Soda.
It helps:
- Break down grease
- Remove odors
- Neutralize bacteria buildup
How to Clean a Very Dirty Mop
Step 1: Prepare a Cleaning Solution
Fill a bucket with warm water and add:
- 1–2 tablespoons of baking soda
- Optional: a small amount of mild detergent
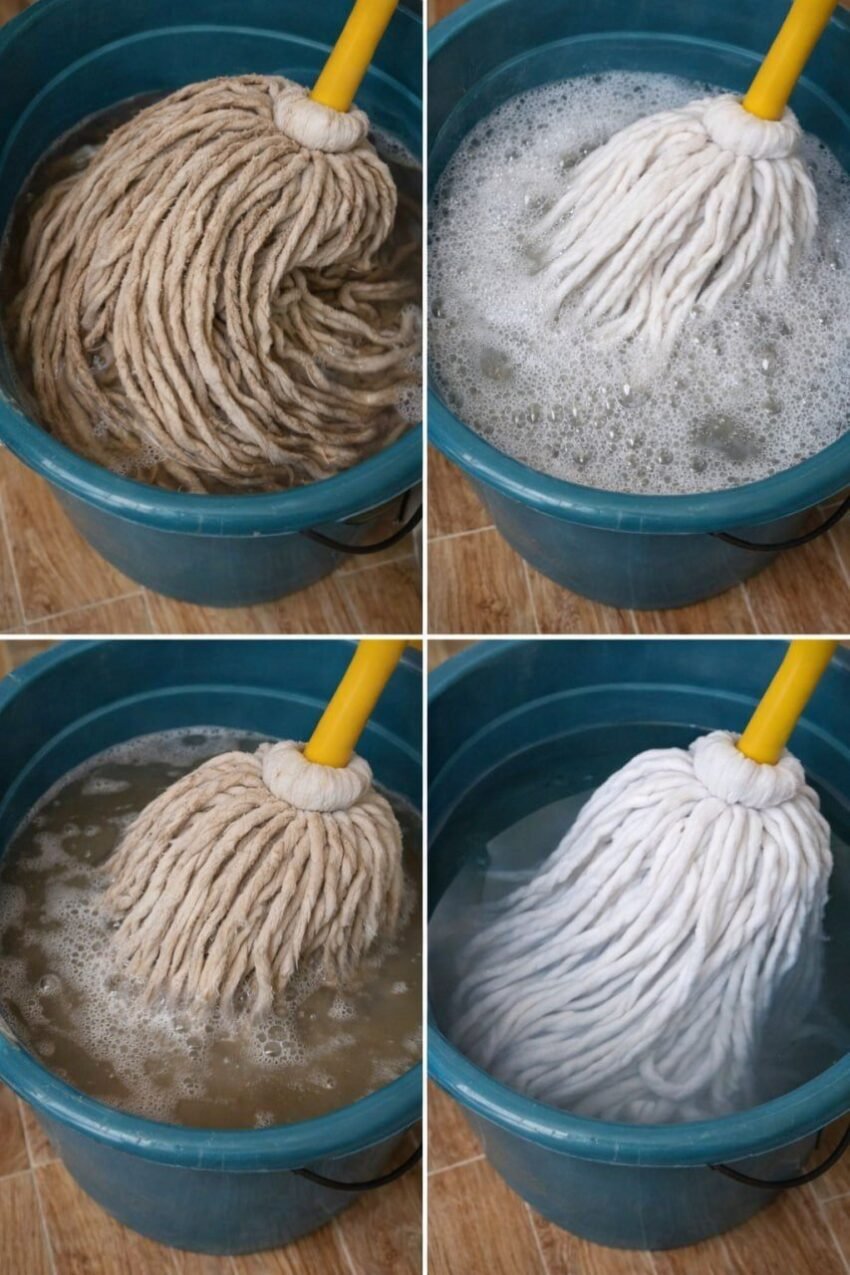
Step 2: Soak the Mop
- Place the mop head in the solution
- Let it soak for 30–60 minutes
Step 3: Scrub Gently
- Rub the mop fibers to remove trapped dirt
- Focus on heavily stained areas
Step 4: Rinse Thoroughly
- Wash with clean water until no residue remains
Step 5: Dry Completely
- Hang the mop in sunlight if possible
- Proper drying prevents mold and odor
Extra Tip for Deep Cleaning
For extremely dirty mops, add a small amount of vinegar along with baking soda for stronger cleaning action (avoid mixing in a closed container).
How Often Should You Clean a Mop?
- Light use: once a week
- Heavy use: after every 2–3 uses
When to Replace a Mop
Even with cleaning, replace your mop if:
- Fibers are falling apart
- Odor remains after washing
- It no longer cleans effectively
Final Thoughts
A dirty mop doesn’t always need to be replaced. With simple household ingredients like baking soda and proper cleaning, you can extend its life and keep your home more hygienic.
If you want, I can share 5 hidden cleaning hacks using baking soda that most people don’t know about.
